Save
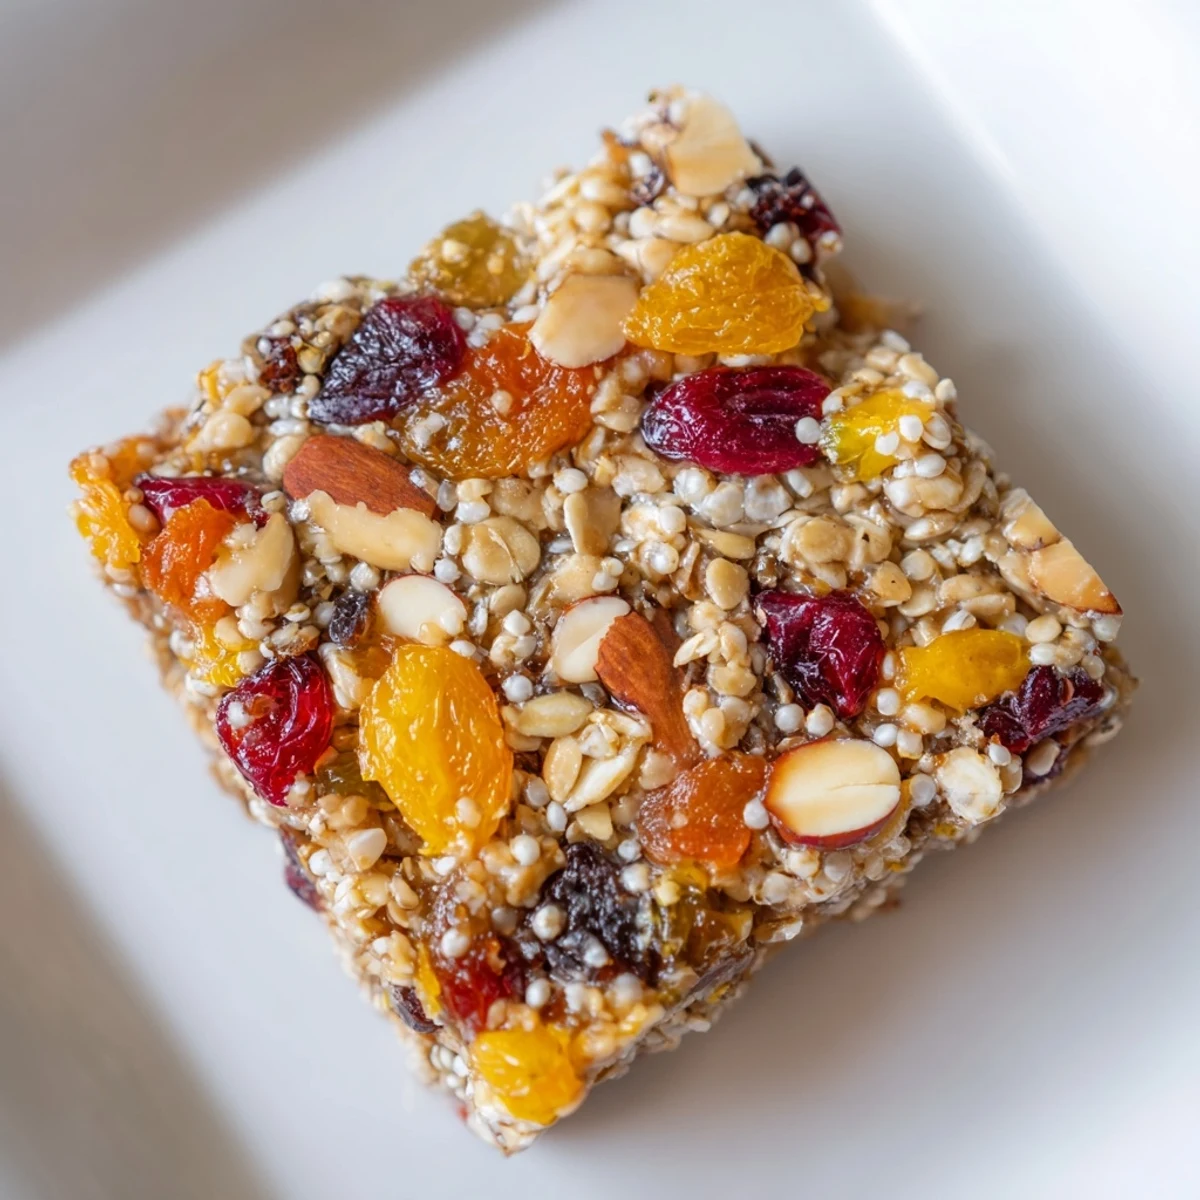
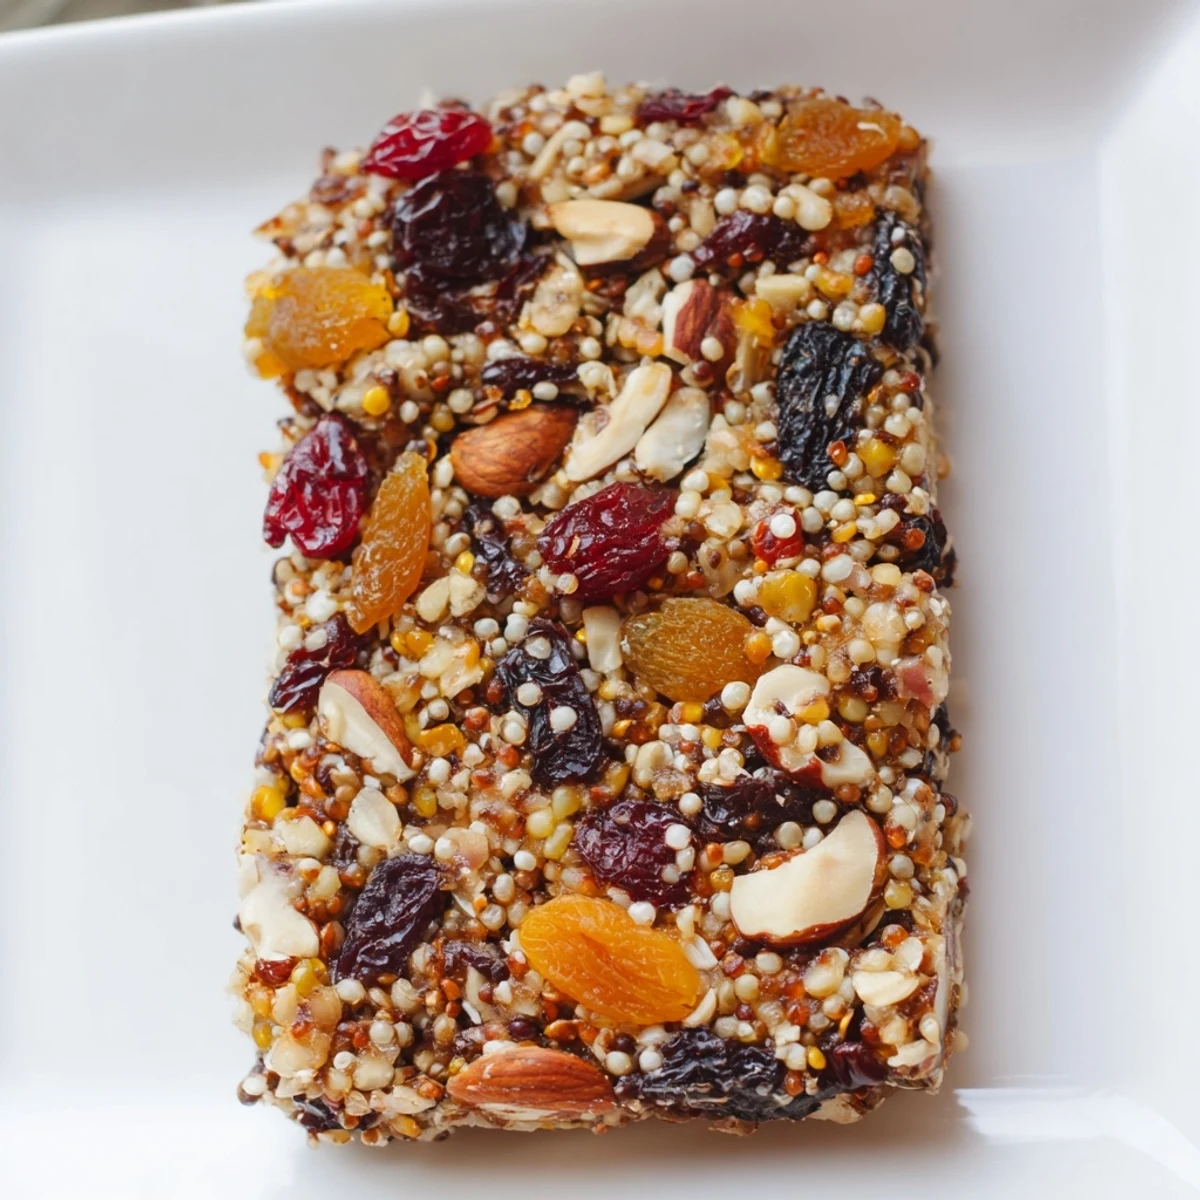
Save These bright quinoa bars combine toasted quinoa and oats with chopped almonds, sunflower seeds, dried apricots, cranberries, and golden raisins. A warm blend of honey, peanut butter, coconut oil, vanilla, and lemon zest binds the mixture, delivering chewy texture and vibrant flavor. Baked until golden and cooled, they make wholesome, portable energy bars perfect for any time of day.
I discovered these bright quinoa bars on a lazy Sunday morning when I was desperately searching my pantry for something to fuel a hiking trip. I'd just bought a bag of quinoa on impulse, thinking I'd finally learn to cook with it properly, and somehow ended up combining it with every colorful dried fruit I could find. The result was nothing short of magical—chewy, nutty, and so vibrant it felt like eating sunshine. Now they're my go-to grab-and-go snack, and I make a batch every other week because they disappear faster than I can cut them.
I'll never forget bringing these to a potluck dinner last spring where everyone was expecting typical store-bought granola bars. When I pulled out these gem-like golden squares scattered with apricots and cranberries, people literally stopped mid-conversation. A friend with celiac disease actually teared up because she could finally eat the snack bars everyone else was enjoying. That moment sealed it for me—this recipe wasn't just delicious, it was inclusive, and it tasted like care.
Ingredients
- Uncooked quinoa, 1 cup: Toast it first to unlock a deeper, nuttier flavor that transforms the entire bar. I learned this the hard way after my first batch tasted a bit flat—toasting changed everything.
- Rolled oats, 1 cup: They add structure and chewiness. Use certified gluten-free if that matters to your household, and don't skip toasting them alongside the quinoa.
- Almonds, 1/2 cup roughly chopped: The rough chop keeps them present and crunchy. If you're nut-free, swap for extra sunflower seeds and the texture will stay just as satisfying.
- Sunflower seeds, 1/4 cup: These add earthiness and nutritional punch. They're my secret favorite ingredient because they toast beautifully and nobody ever guesses what they are.
- Dried apricots, 1/3 cup chopped: The star of the show—bright, tart, and slightly chewy. Buy them from the bulk bin if you can; they taste fresher and you save money.
- Dried cranberries, 1/3 cup: They provide tartness and a little visual pop of deep red. The tartness balances the sweetness perfectly.
- Golden raisins, 1/4 cup: More subtle than regular raisins, they disappear into the bars and add natural sweetness without overpowering.
- Honey, 1/3 cup: The binding agent that holds everything together. Maple syrup works equally well if you're vegan, and honestly, I can't taste a difference in the final bars.
- Natural peanut butter or almond butter, 1/4 cup: This creates richness and helps bind the mixture. Use whatever you have; both work beautifully.
- Coconut oil, 2 tbsp melted: It adds moisture and helps everything stick together without making the bars greasy. Don't skip this.
- Vanilla extract, 1 tsp: Just enough to round out the flavors without being obvious.
- Lemon zest, from 1 lemon: This is the game-changer that makes people ask for the recipe. It's bright, it's unexpected, and it makes the whole bar feel alive.
- Fine salt, 1/4 tsp: A tiny pinch that amplifies all the other flavors. It's that secret ingredient that people can taste but can't quite name.
Instructions
- Prepare Your Pan:
- Line your 8x8-inch baking pan with parchment paper, letting the edges hang over the sides like a gift wrap. This is the kindest thing you can do for your future self—it means you'll lift these bars out perfectly and won't spend ten minutes scraping sticky edges. Preheat your oven to 350°F while you gather your ingredients.
- Toast the Grains:
- Spread the uncooked quinoa and rolled oats on a baking sheet and slide them into the oven. Toast for 8 to 10 minutes, stirring halfway through, until they smell warm and nutty and have turned a light golden color. This step is crucial—it develops flavor that raw grains simply can't match. Remove and let cool for a minute or two while you gather your other ingredients.
- Combine the Dry Ingredients:
- In a large bowl, toss together the toasted quinoa and oats with the chopped almonds, sunflower seeds, apricots, cranberries, and raisins. It should look like a treasure chest of colors. Don't skip mixing them now—it ensures even distribution, so every single bar tastes consistent.
- Create the Binding Liquid:
- In a small saucepan over low heat, combine the honey, peanut butter, and coconut oil. Stir constantly until everything is smooth and pourable, maybe two or three minutes. Remove from heat and immediately stir in the vanilla extract, lemon zest, and salt. The warmth helps them incorporate beautifully. You'll notice the mixture smells incredible—citrus, vanilla, nutty richness.
- Bring It Together:
- Pour the warm wet mixture over your dry ingredients and stir until everything is evenly coated. Use a sturdy spoon or spatula and don't stop until you don't see any dry streaks. This is important—uneven distribution means some bites will be dry.
- Press Into the Pan:
- Transfer the mixture to your lined pan and press it down firmly and evenly using a spatula or the back of a sturdy spoon. Compress it really well—the tighter you pack it, the more cohesive your bars will be when baked. It should feel like you're really working it, and the surface should be flat and smooth.
- Bake Until Golden:
- Bake for 15 to 18 minutes, until the edges turn golden brown. The center will still feel slightly soft—that's exactly right. Overbaking makes them hard instead of pleasantly chewy. Remove from the oven and let cool completely in the pan. This patience is essential; the bars firm up as they cool.
- Cut and Enjoy:
- Once completely cooled, use the parchment overhang to lift the entire slab out of the pan. Using a sharp, clean knife, cut into 12 even bars. A hot knife wiped clean between cuts prevents sticking and gives you clean edges. Store in an airtight container.
 Save
Save I think the moment these bars truly became meaningful was when my neighbor's teenager asked for the recipe. This kid eats nothing but pizza and cereal, and yet he was reaching for my homemade bars over everything else in my kitchen. That's when I realized I'd created something that bridges the gap between health-conscious snacking and actual enjoyment. Food should never feel like a compromise.
Flavor Variations You'll Want to Try
The beauty of this recipe is how adaptable it is. Once you've made the basic version, you'll start seeing opportunities everywhere. I've added mini dark chocolate chips for decadence, swapped the peanut butter for tahini for an earthy twist, and even experimented with orange zest instead of lemon. Each variation feels like a new recipe without being complicated. The quinoa base is so forgiving that you can really play around, and I encourage you to trust your instincts. If you like it, try it.
Storage and Make-Ahead Magic
These bars are the ultimate make-ahead snack because they actually improve after a day or two. The flavors meld, the texture becomes more cohesive, and they taste even better. I make a batch every other Sunday and keep them in an airtight container on the counter for easy grabbing, or in the refrigerator if it's warm. They last up to a week, though honestly, they never last that long in my house. You can also freeze them for up to a month if you want to stash a batch for emergencies.
- An airtight glass container works better than plastic for keeping them fresh and preventing staleness
- Cut and store them at room temperature for best texture—refrigeration makes them a bit harder
- Wrap individual bars in parchment paper if you're taking them on a trip; they travel beautifully
Customizing for Dietary Needs
I love that this recipe works for so many different people. If you need to remove nuts, swap the almonds and peanut butter for sunflower seed butter and add an extra quarter cup of sunflower seeds. The bars will be just as delicious. If you're vegan, use maple syrup instead of honey and any plant-based butter you prefer. The gluten-free element is built in—just make sure your oats are certified gluten-free if you're cooking for someone with celiac disease. I've never had to remove the lemon zest for allergies, but it's the easiest thing to skip if citrus is a concern.
- Always check your dried fruits for hidden gluten if you're serving someone with celiac disease
- The recipe is naturally dairy-free, making it perfect for so many different dietary needs
- If you're serving someone with multiple allergies, read every label carefully because hidden ingredients hide in surprising places
 Save
Save These bright quinoa bars taught me that snacking doesn't have to be a guilty pleasure or a compromise. When you make something yourself, with real ingredients you recognize and flavors you actually love, eating well stops feeling like a chore. I hope these bars become a staple in your kitchen like they are in mine.
Recipe Questions & Answers
- → Can I substitute the nuts for a nut-free option?
-
Yes, sunflower seed butter can replace peanut or almond butter to keep the bars nut-free while maintaining a creamy texture.
- → How should these bars be stored?
-
Store the bars in an airtight container for up to one week to keep them fresh and chewy.
- → Is it necessary to toast the quinoa and oats?
-
Toasting enhances the nutty flavor and improves the texture, making the bars more flavorful and slightly crunchy.
- → Can I use maple syrup instead of honey?
-
Maple syrup works well as a vegan alternative, providing sweetness and helping to bind the ingredients together.
- → What baking pan size is needed for these bars?
-
An 8x8-inch (20x20 cm) baking pan lined with parchment paper ensures even baking and easy removal of the bars.